Amusez-vous!
vendredi 19 août 2011
dimanche 24 juillet 2011
samedi 25 juin 2011
Fleur en satin
J'ai le goût de vous montrer un vidéo aujourd'hui. On y apprend comment faire une belle fleur avec du ruban de satin.
http://www.youtube.com/watch?feature=player_embedded&v=wT09jAaCGEM
mercredi 15 juin 2011
samedi 28 mai 2011
Une boîte cadeau
1. Cut 3 pieces of cardstock:
7-1/2" x 10-1/4"
3" x 4"
1-1/4" x 4" - score at 1/2", 2", 3-1/2"
2. Cut 1 piece of Medium Window Sheet: 4" x 4" - set this aside for now.
3. You will need to score the 7-1/2" x 10-1/4" piece of cardstock.
Score it at 1/2", 1-1/8"", 1-3/4", 5-3/4", 6-3/8", 7"
Turn it and score it at 7-1/2", 8-3/4"
Stamp all pieces of cardstock at this point. Remember, for this tutorial, I left mine plain.
4. Trim as shown.
5. Fold on all score lines. Notice how some folds are mountain, some valley.
6. Fold the cardstock, measuring 1-3/4" x 4" on score lines as shown.
7. Adhere together and add Sticky Strip to bottom as shown. This will go on the inside of the box to separate the 2 bottles of bath product. Set aside for now.
8. Add Sticky Strip to the 1/2" edges of box.
9. Adhere the Window Sheet about 1-1/8" from the bottom.
10. Attach trim to one of the 4" lengths of the cardstock measuring 3" x 4". If you are going to add brads for embellishments, now is the time to do so.
11. Adhere this piece (from step #10) to the top of the box.
12. Fold up the bottom flap and adhere it.
13. At this point you will need to add the "divider" from step #6. I found it easiest to just gently slide it down into the box, centering it on the bottom. Use a bone folder to smooth it firmly in place.
14. Fold the top of the box together and punch 2 ovals at the top for the handle.
Désolée pour l'anglais; des images valent milles mots!
vendredi 13 mai 2011
jeudi 12 mai 2011
vendredi 29 avril 2011
Petite sacoche
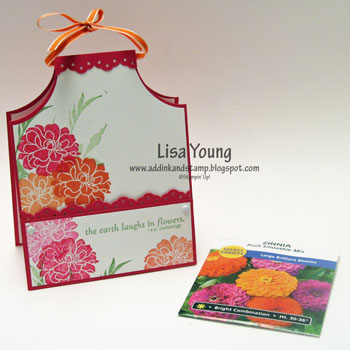
Details: This purse uses 2 Ghirardelli Squares. The beauty of this is that the purse can stand up and therefore also makes a really cute place card holder. I used the in-colors to create a rainbow of purses with matching designer paper, ribbon and glimmer brads. The other cool thing, is that you can get 4 purses out of a sheet of 12" x 12" designer paper.
1. Start with a piece of cardstock 11-½” x 3”. On the long side, score at 3”, 5-¾” and 8-½”.
-------------------------------------------------------------------------------
2. On the 5-¾” score mark, cut in 5/8” on both sides.
--------------------------------------------------------------------------------
3. On the side of the paper that will face outwards, place four ½” pieces of double-sided adhesive on either side of the cut marks.
--------------------------------------------------------------------------------
4. Remove ONE of the adhesive liners and adhere one of the ends of a 7” length of ribbon to it. Feed the ribbon through the cut mark to the backside of the designer paper.
--------------------------------------------------------------------------------
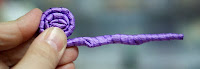
5. Loop the ribbon around and feed it through the cut mark on the other side. Remove ONE more adhesive liner and adhere the other ribbon end to it. In the photo, I’m lifting up the designer paper, so that you can see how the ribbon is looped and also where it is adhered on the other side.
--------------------------------------------------------------------------------
6. Remove the final two adhesive liners and fold the designer paper in half.
--------------------------------------------------------------------------------
7. Place a one-inch strip of double-sided adhesive on the square next to the ribbon handle. Repeat for the other side.
--------------------------------------------------------------------------------
8. Remove one of the adhesive liners and adhere one of the Ghirardelli squares just above the score line. Repeat for the other side.
--------------------------------------------------------------------------------
9. This is what the purse will look like once both Ghirardelli squares are in place.
--------------------------------------------------------------------------------
10. Close the purse and pierce through the top layers and secure with a glimmer brad. Make sure that the top edges of the purse are aligned before piercing. The outer sides are meant to bow slightly to accommodate the chocolates and to look stylish.
--------------------------------------------------------------------------------
11. Decorate the rest of the purse as desired.
--------------------------------------------------------------------------------
Créations de Qbee (aka Brenda)
mercredi 13 avril 2011
Une belle pointe de tarte
vendredi 25 mars 2011
Tutoriel pour faire une belle rose
N'est-ce pas une belle rose?! Si vous voulez voir le tutoriel, cliquez sur le lien suivant
http://www.carlas-scraps.com/2010/12/ribbon-rose-tutorial.html
mercredi 23 février 2011
Faire une fleur en ruban
Une petite idée toute simple aujourd'hui pour créer des fleurs originales!
Vous aurez besoin:
- cure-pipe
- ruban
- ruban double face
La première étape consiste à mettre du ruban double face sur toute la longueur de votre ruban (sur la surface sans motif, si vous avez des motifs).
Ensuite, vous devez venir fixer votre ruban sur le cure-pipe en l'enroulant un peu de biais.
Vous entortillez complètement votre ruban - vous coupez l'excédent du cure-pipe si nécessaire.
Sur une des surface de votre cure-pipe enrubanné, vous venez mettre du ruban double face.
Finalement, vous enroulez le cure-pipe enrubanné sur lui-même - comme si vous vouliez en faire une coquille d'escargot.
Et voilà, le tour est joué...
Voici une carte réalisée avec la fleur créée pour illustrer cette technique!
Amusez-vous bien!
Le tout vient de Joanie @ Francofun
Inscription à :
Articles (Atom)